Adding a domain name (DNS record)
You can associate your instance with a domain name by creating a DNS record, which is easier to remember than an IP address. Also, if the IP address of your instance happens to change (e.g. because you had to delete and relaunch the VM from the same image), you can simply update the DNS record once to point to the new IP address. This is useful if you connect from multiple machines, or if you have given others access to your VM.
For new projects and projects with allocations being renewed, a Nectar provided DNS zone will be created automatically for your project to use. (Trial projects do NOT have one.) They are typically in the format <project-name>.cloud.edu.au.
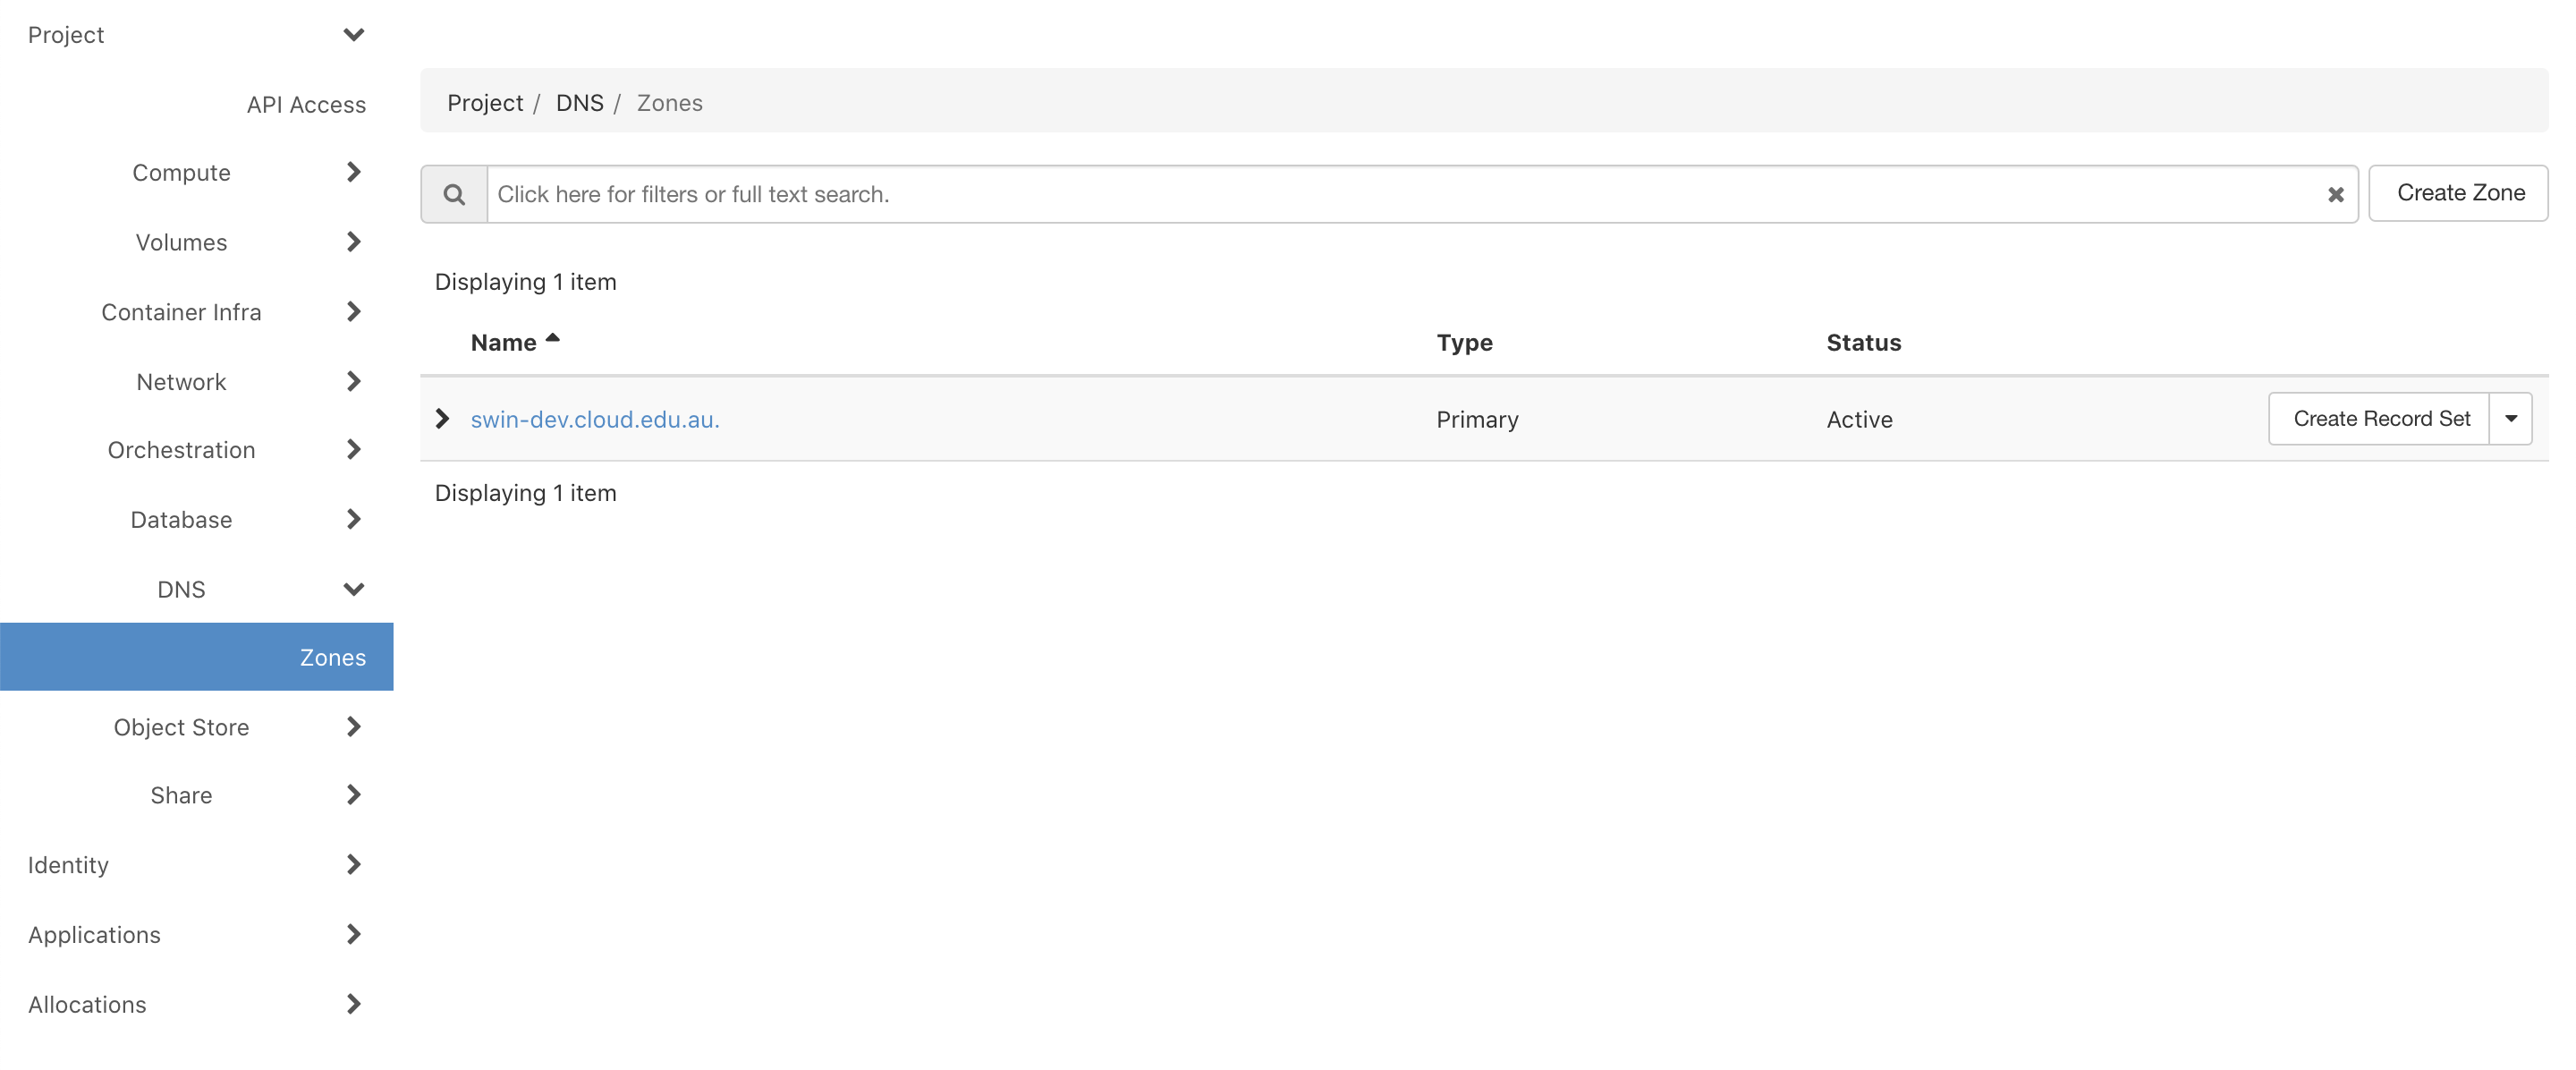
You can find your DNS zone in the dashboard by navigating to Project > DNS > Zones in the sidebar. Then, to create a domain name for your instance, select Create Record Set.

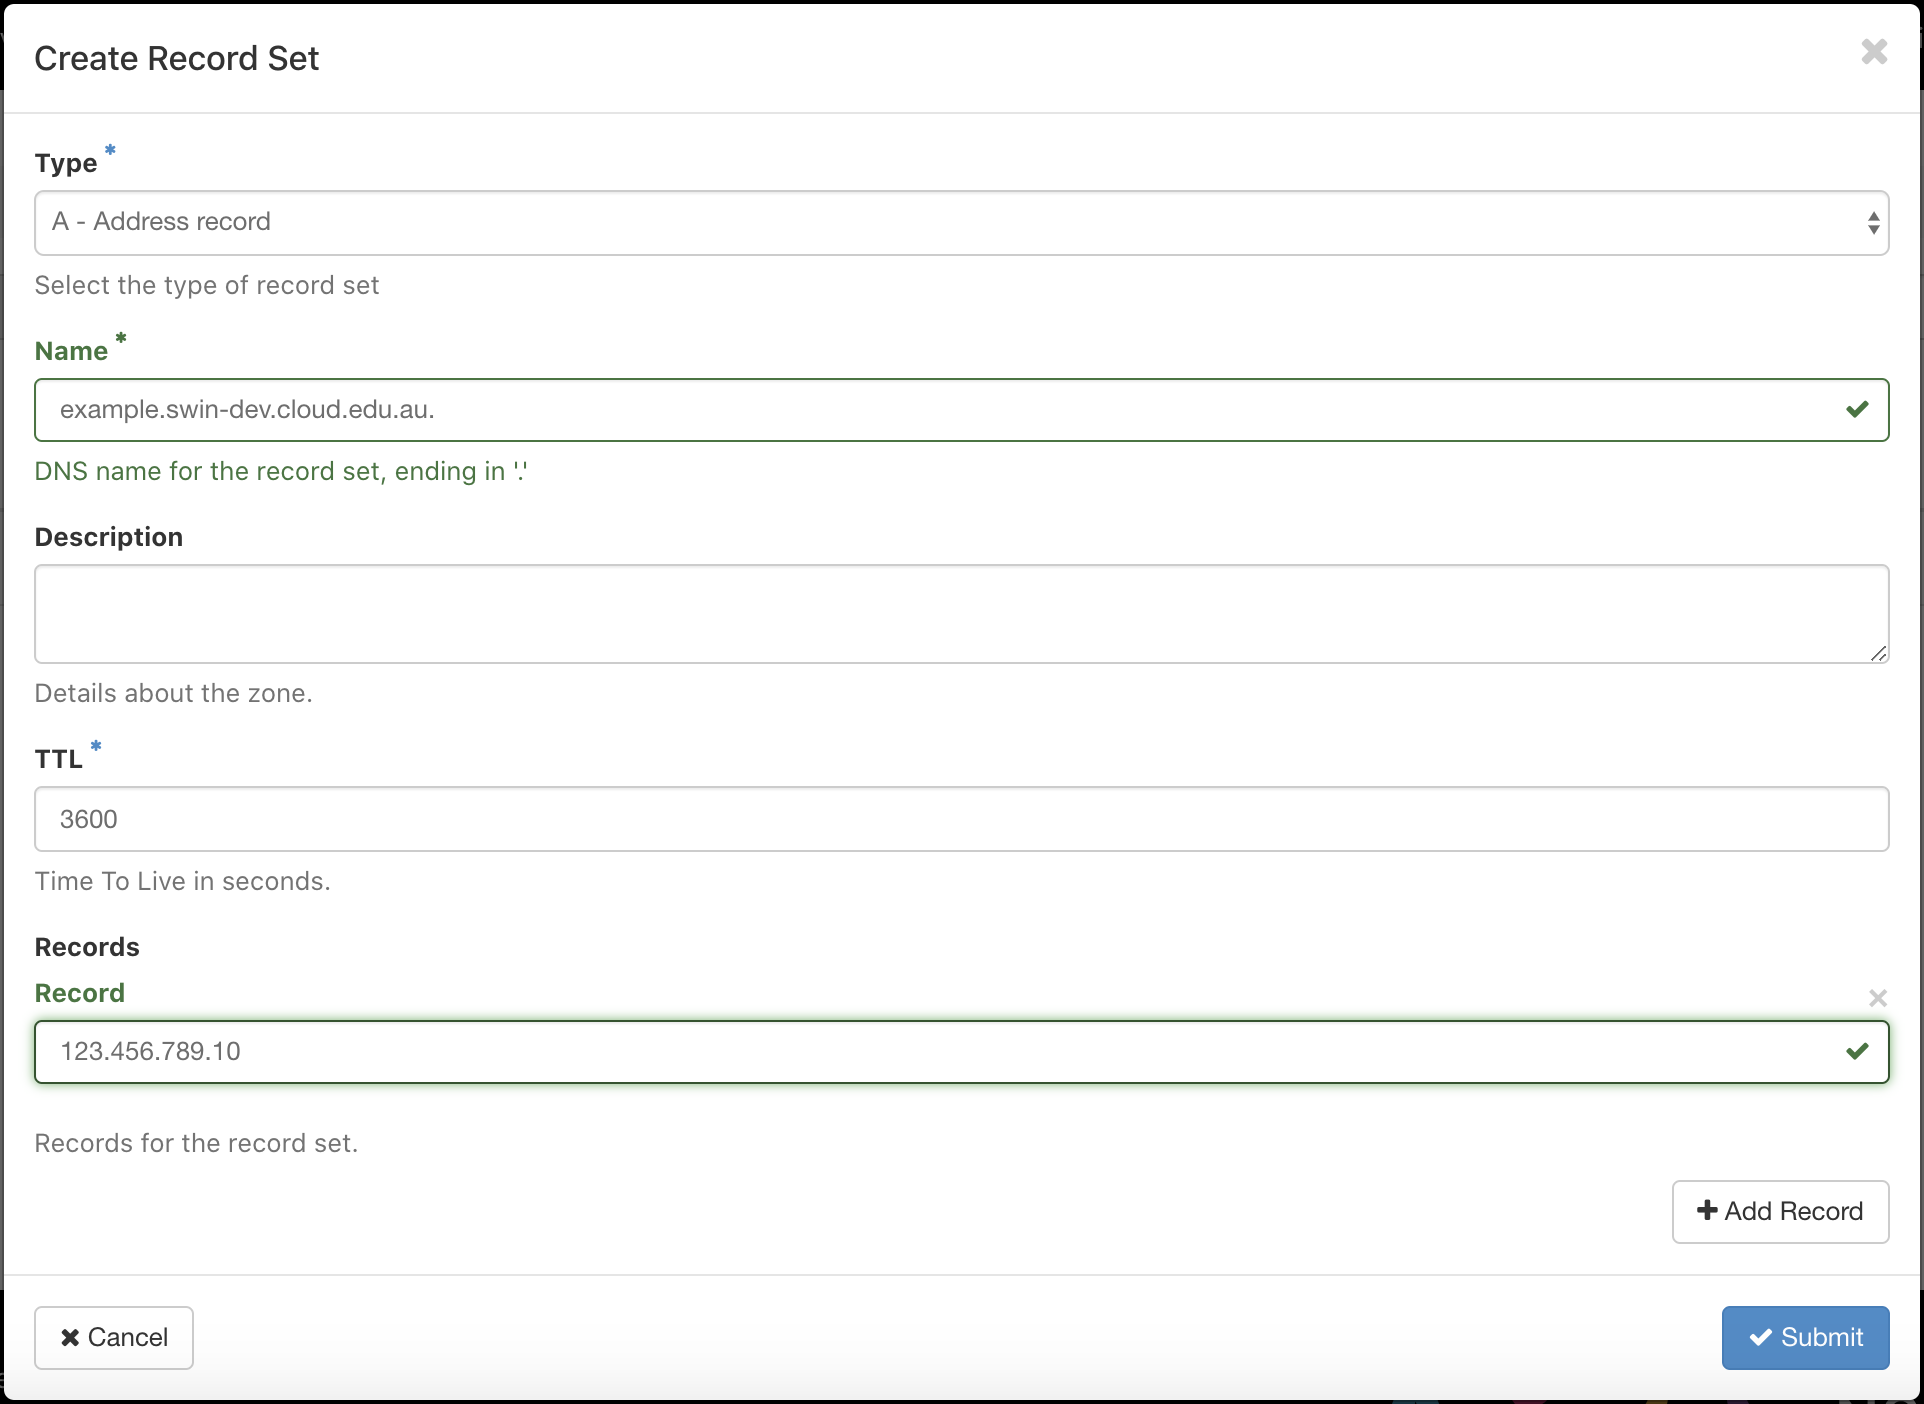
- We will create a Type A - Address record, which points a domain name to a specific IPv4 address.
- The start of the DNS name is your choice, but it must end in the zone name (and make sure to include a trailing
.). For exampleexample.swin-dev.cloud.edu.au. - Finally, add the IP address of your instance to the
Recordfield.

After you hit Submit, your instance should be accessible via your chosen domain name. For example,
$ ssh -i ~/.ssh/nectarkey.pem ubuntu@example.swin-dev.cloud.edu.au
Don't forget to update the HostName in your ssh config file(s)
Host nectar
   HostName = example.swin-dev.cloud.edu.au
   User = ubuntu
   IdentityFile = ~/.ssh/nectarkey.pem
   ForwardX11 = yes