Launching an instance
Remember
Before you launch an instance, you should have an ssh key pair and an ssh security group otherwise you won't be able to access your virtual machine. Go back and create these if haven't already done so.
Details
On the left panel of the dashboard select the Compute tab, then select Instances. Here is where you will see and be able to manage any instances (VMs) that you have created. To create a new one press the Launch Instance button to bring up a 'Wizard'.
Note
The Launch Instance button will be greyed out if you have maxed out your quota. You may need to delete any previous unused instances first, or you should make a request for more resources.

Give your instance a name and description. Leave the availability zone on Any Availability Zone, which allows Nectar to choose automatically, and leave the Count field on 1 since we are only making a single instance.
Source
After pressing Next you can choose the source for your instance. We will boot from an image -- a pre-prepared operating system.
There are several public images provided by Nectar that are available. These are updated on a semi regular basis and have a higher level of quality assurance than community images, but come pretty 'bare-bones'.
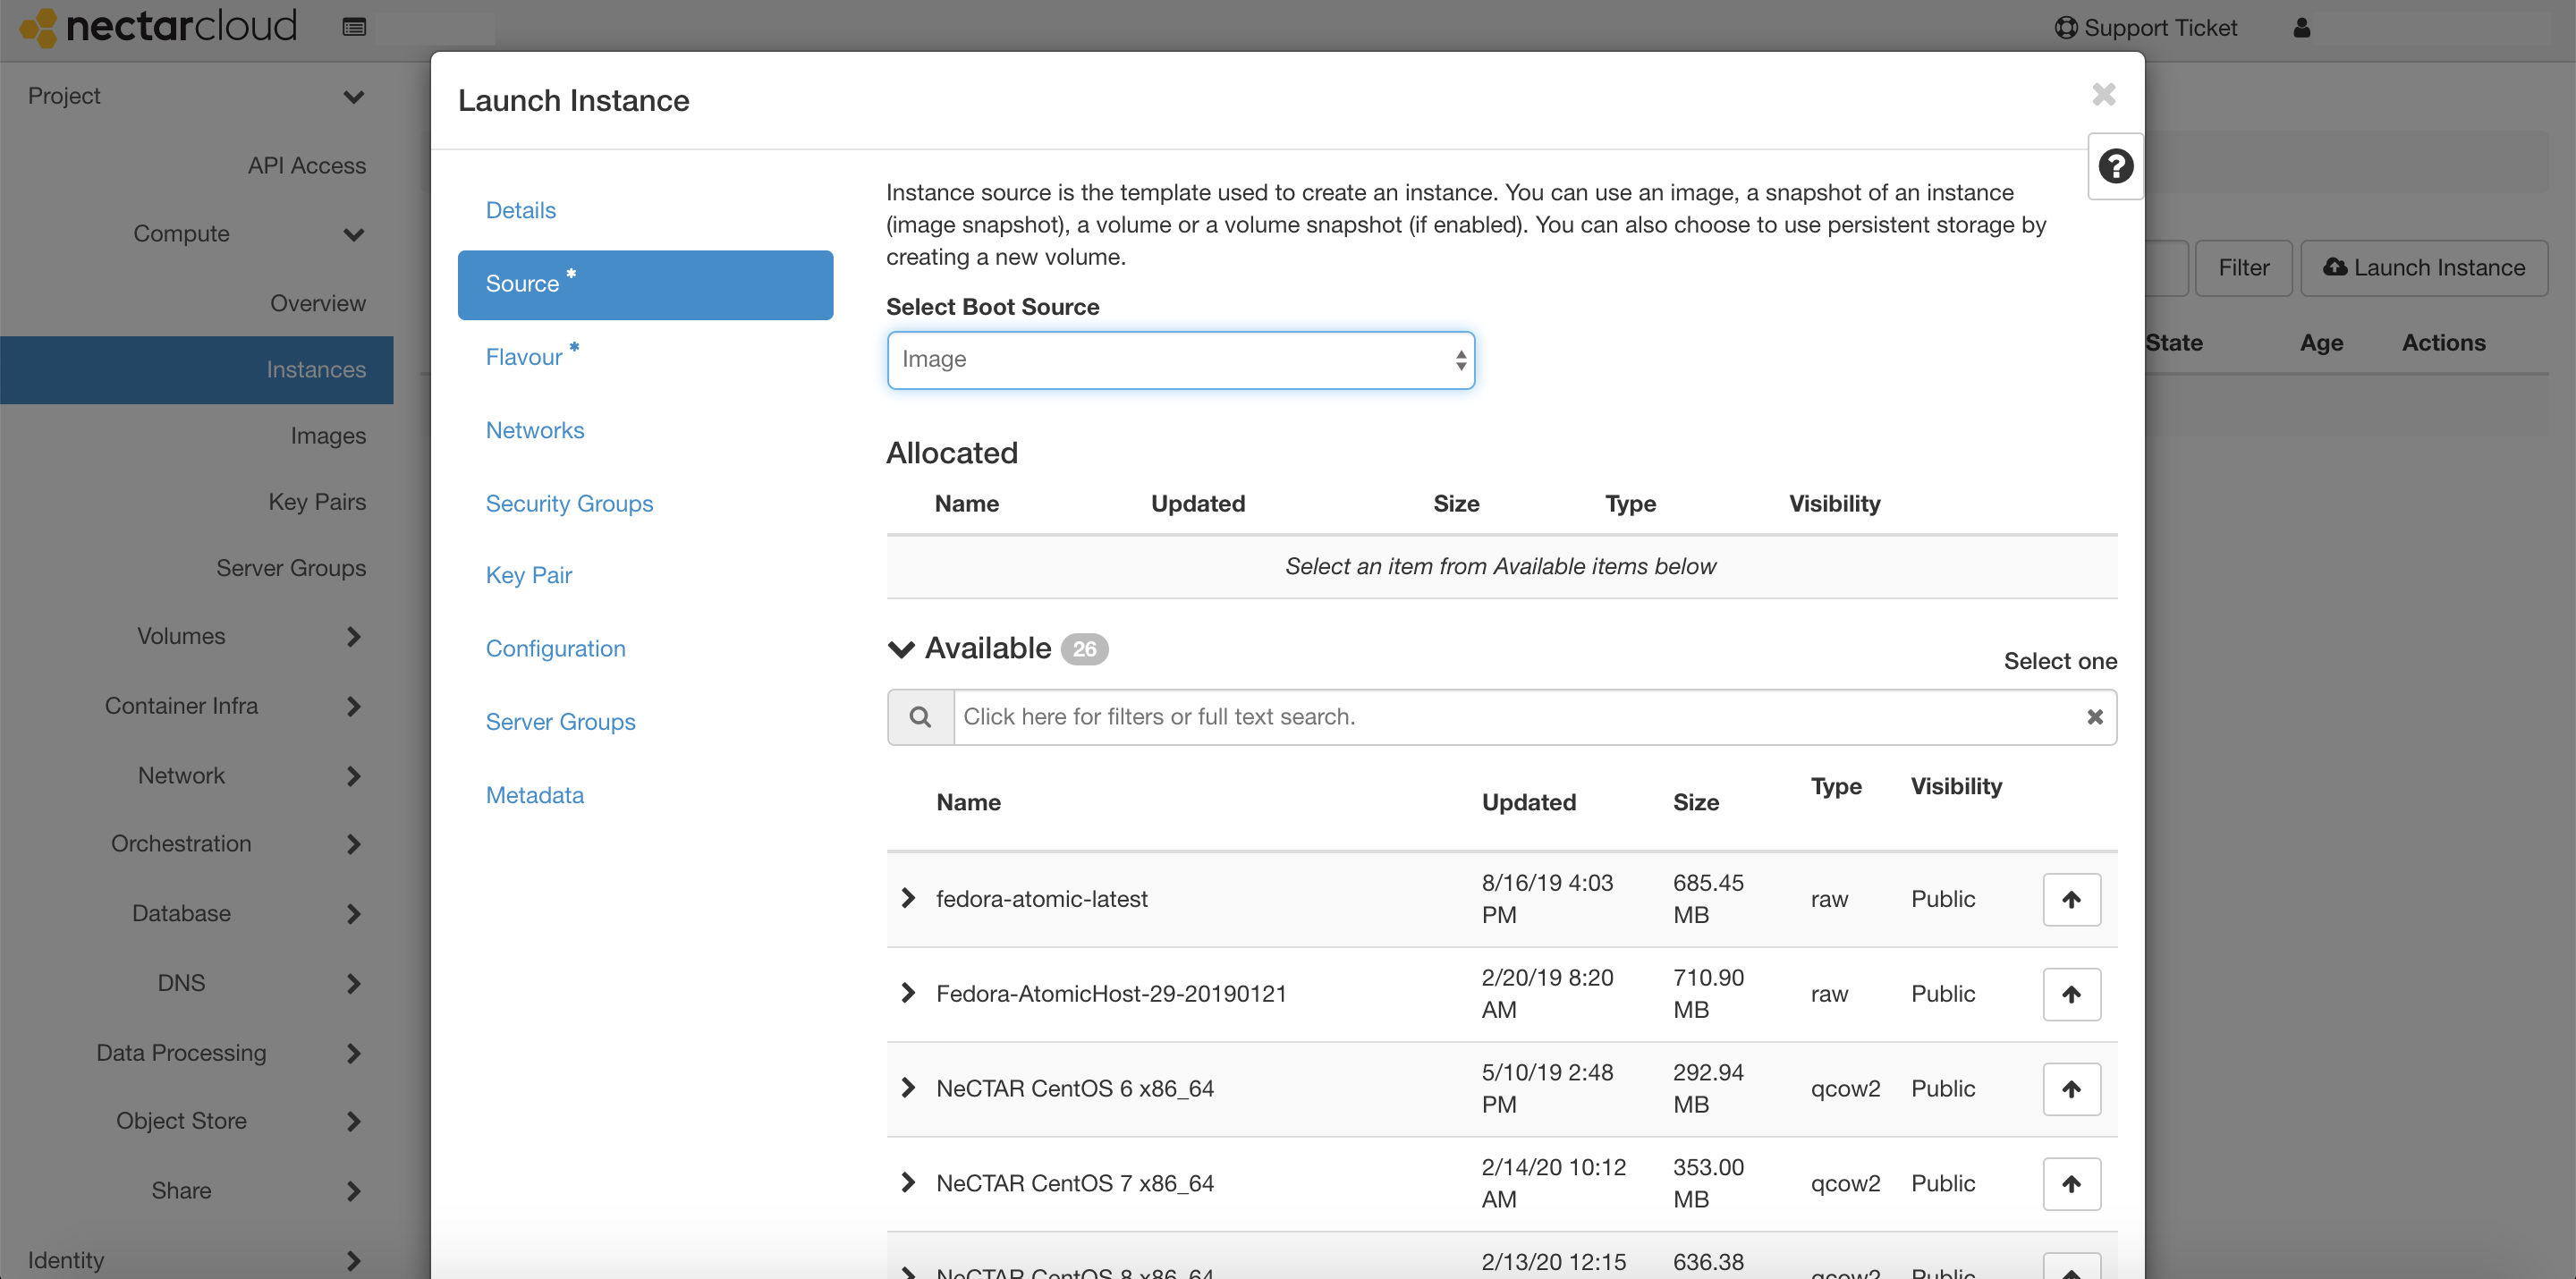
Community images are created and shared by other Nectar users and are visible to everyone. You can find them through the search bar (note that they only show up once you begin searching).
We will boot from one of public images provided by Nectar, namely NeCTAR Ubuntu 18.04 LTS (Bionic) amd64.
To select the image, click the up arrow next to it. Then hit 'next' to continue.
Users with projects approved as an astronomy allocation on the Swinburne zone will also have access to a set of additional images, which have been provisioned with some useful software packages.
Warning
Community images do not have quality assurance, and may include software with security vulnerabilities. Take care when launching with an image from an un-trusted source.
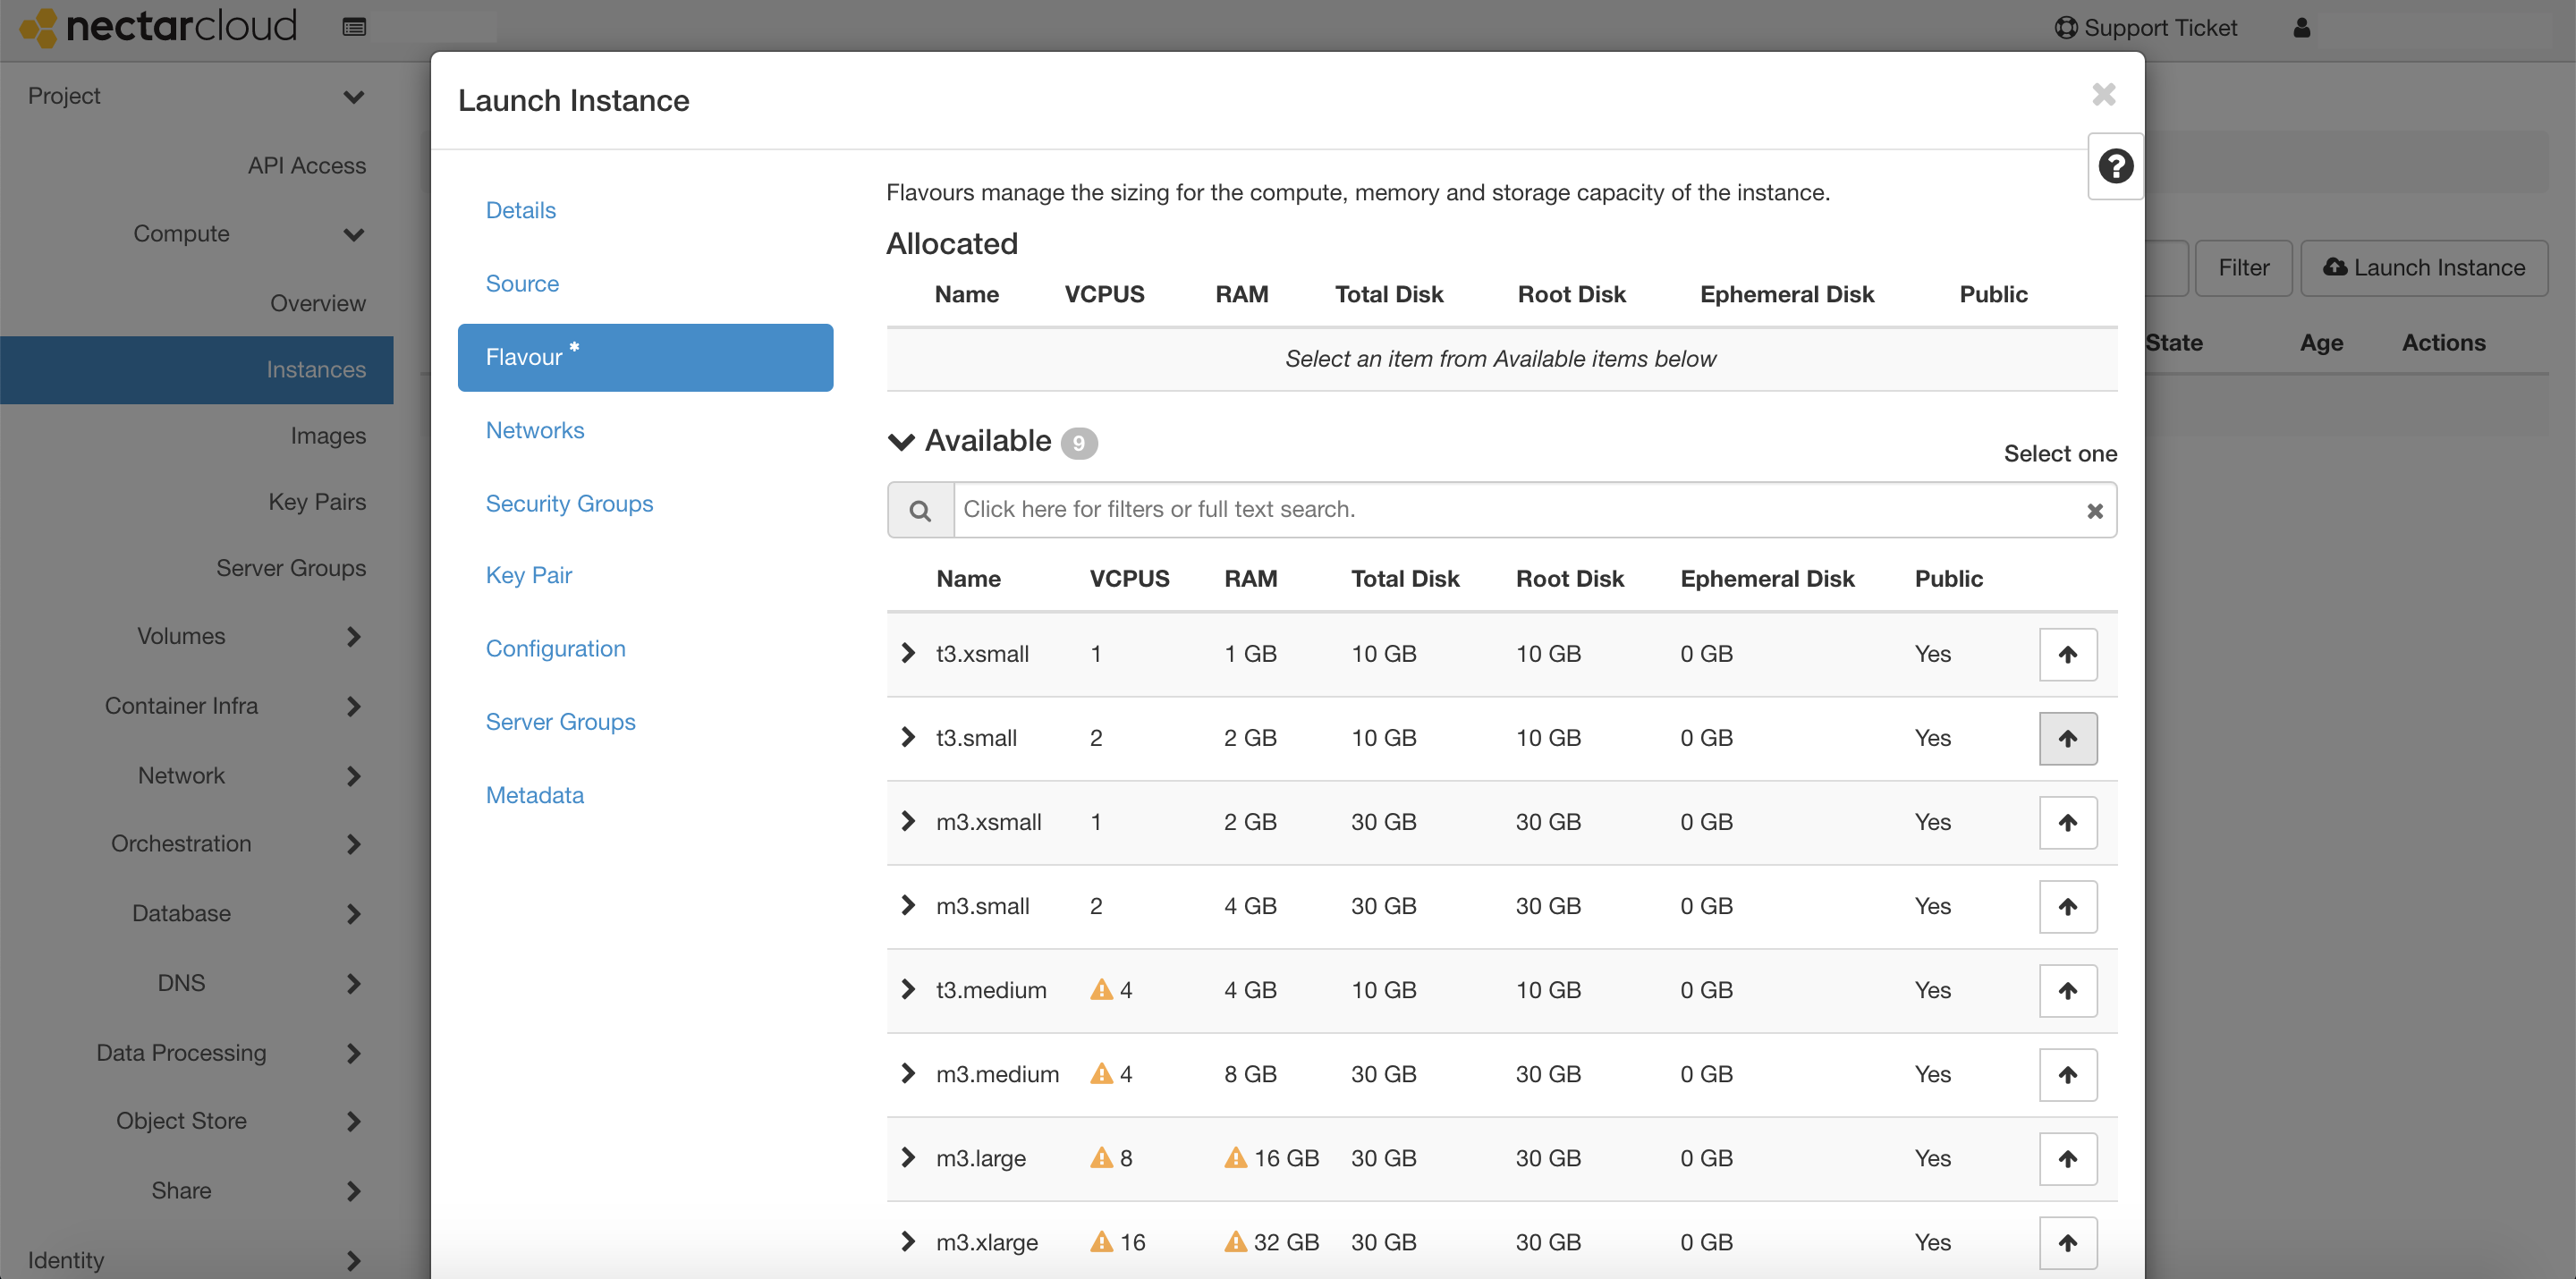
Flavour
We now get to choose a 'flavour' for our instance, which is basically a choice of sizing for the compute, memory and storage capacity of the VM. What you can select depends on your project quota, but everyone with a trial project should be able to use one of the small flavours.
Let's select m3.xsmall by pressing the up arrow button next to it.
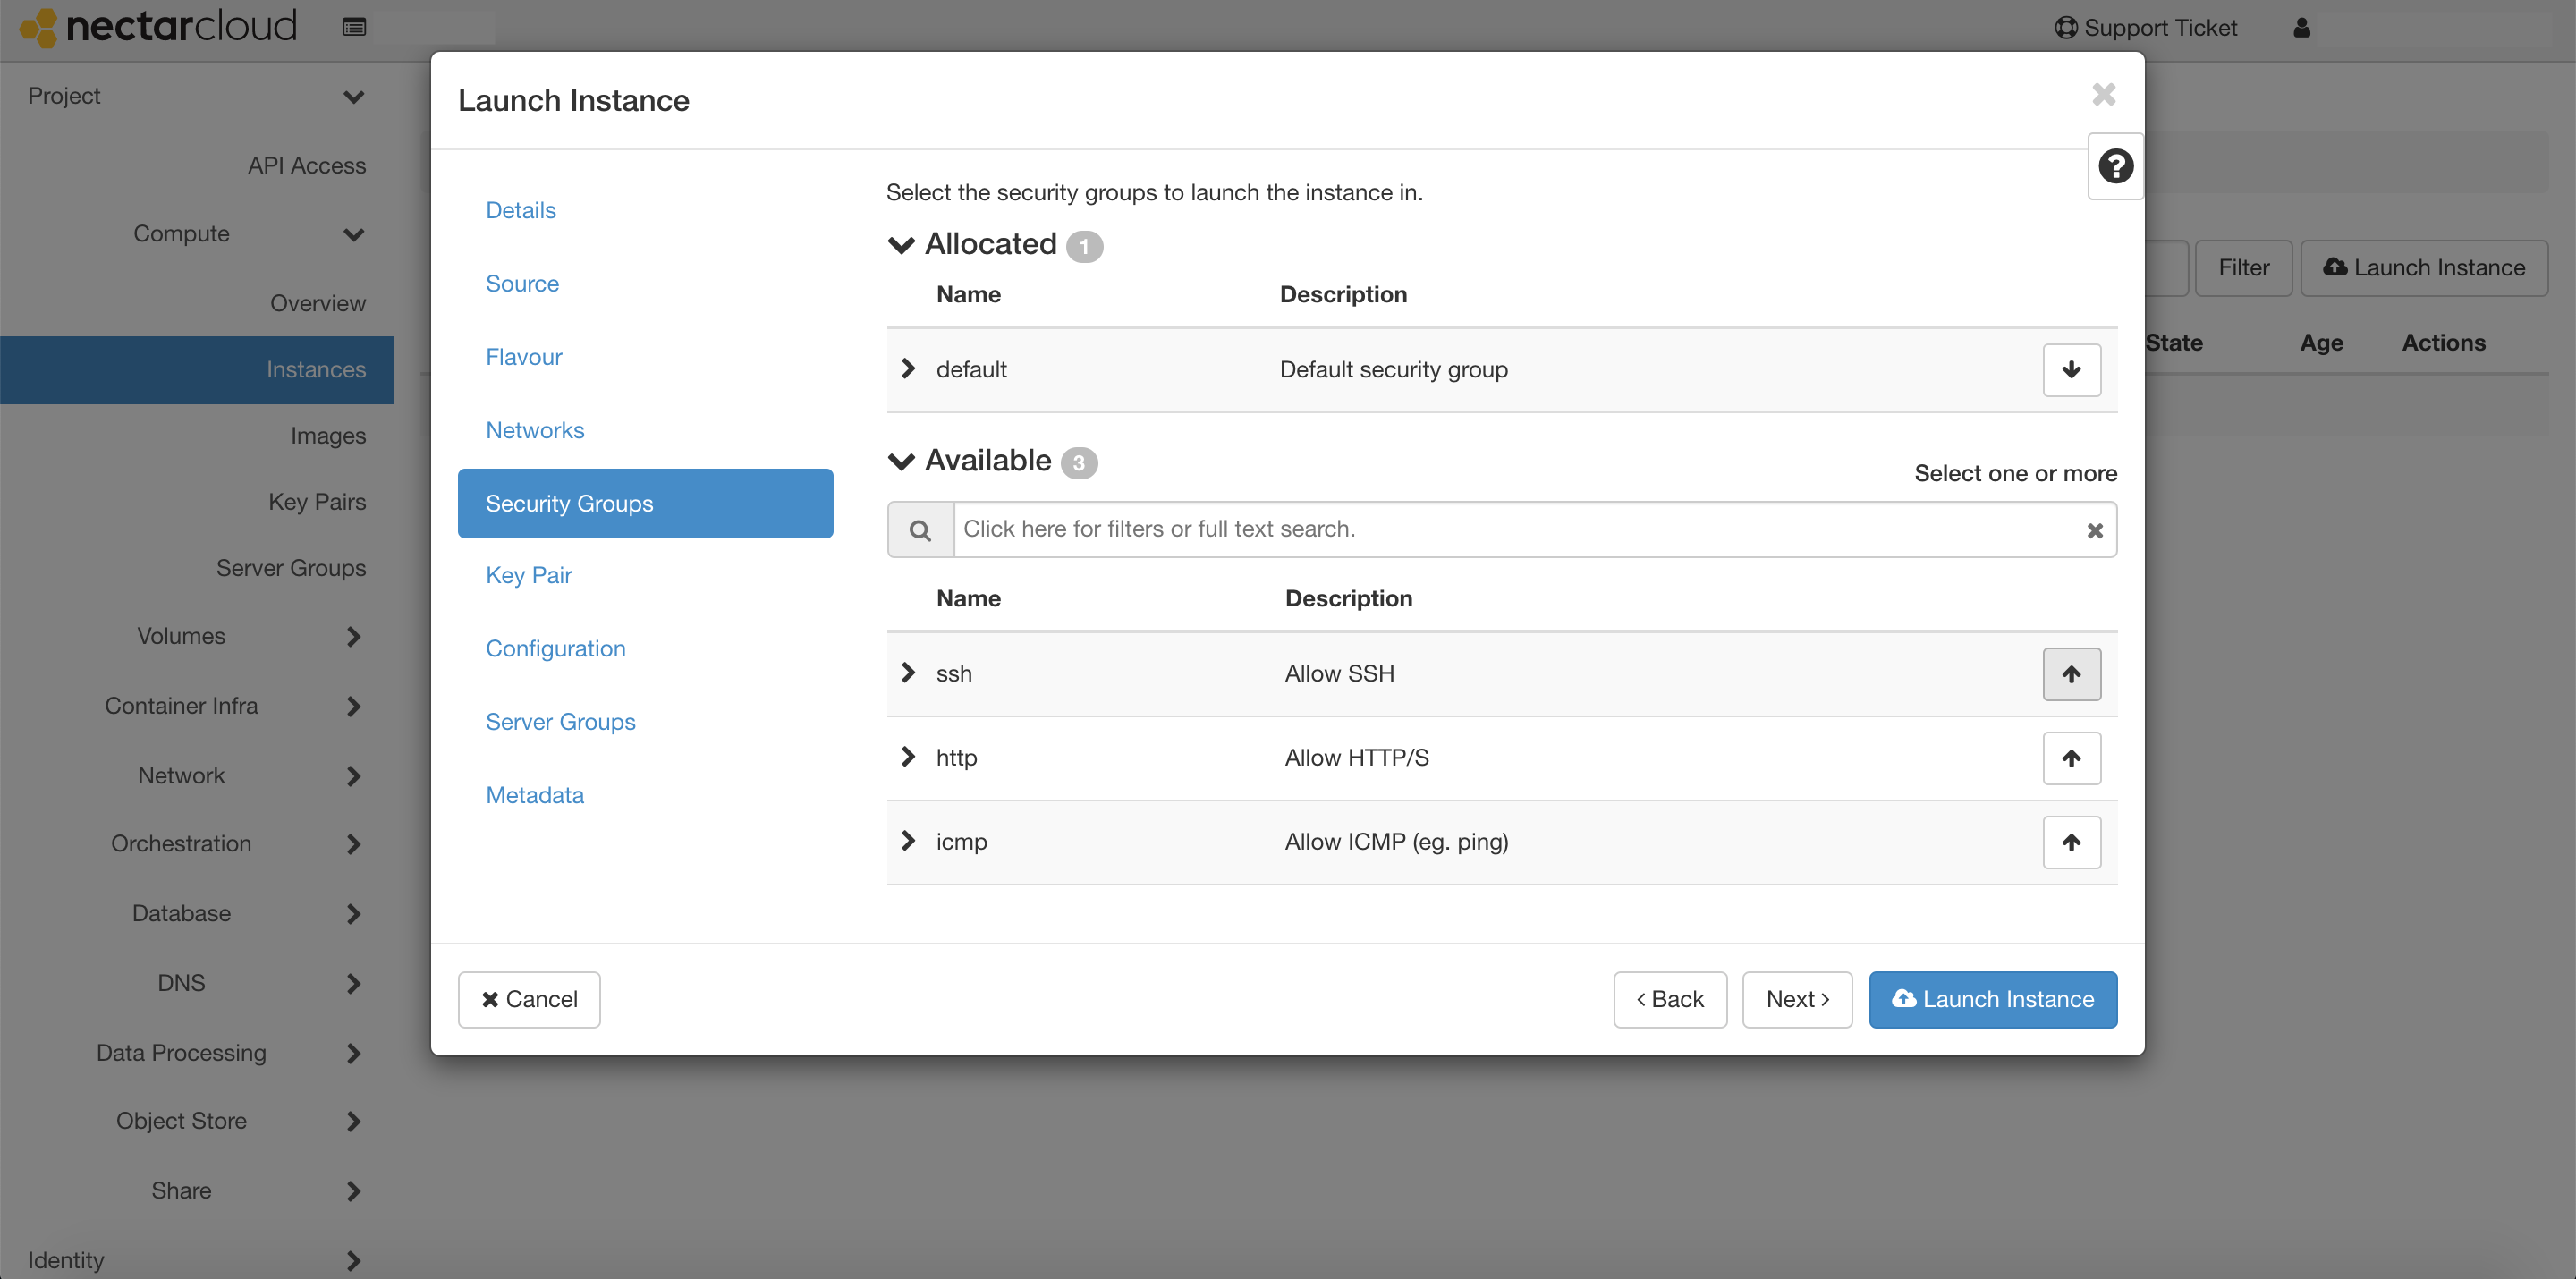
Security Groups
Next, press Security Groups on the left panel, and select ssh to allow SSH connections in your virtual machine.
Tip
If you forget to do this, you can always add a security group to your instance after it has launched.
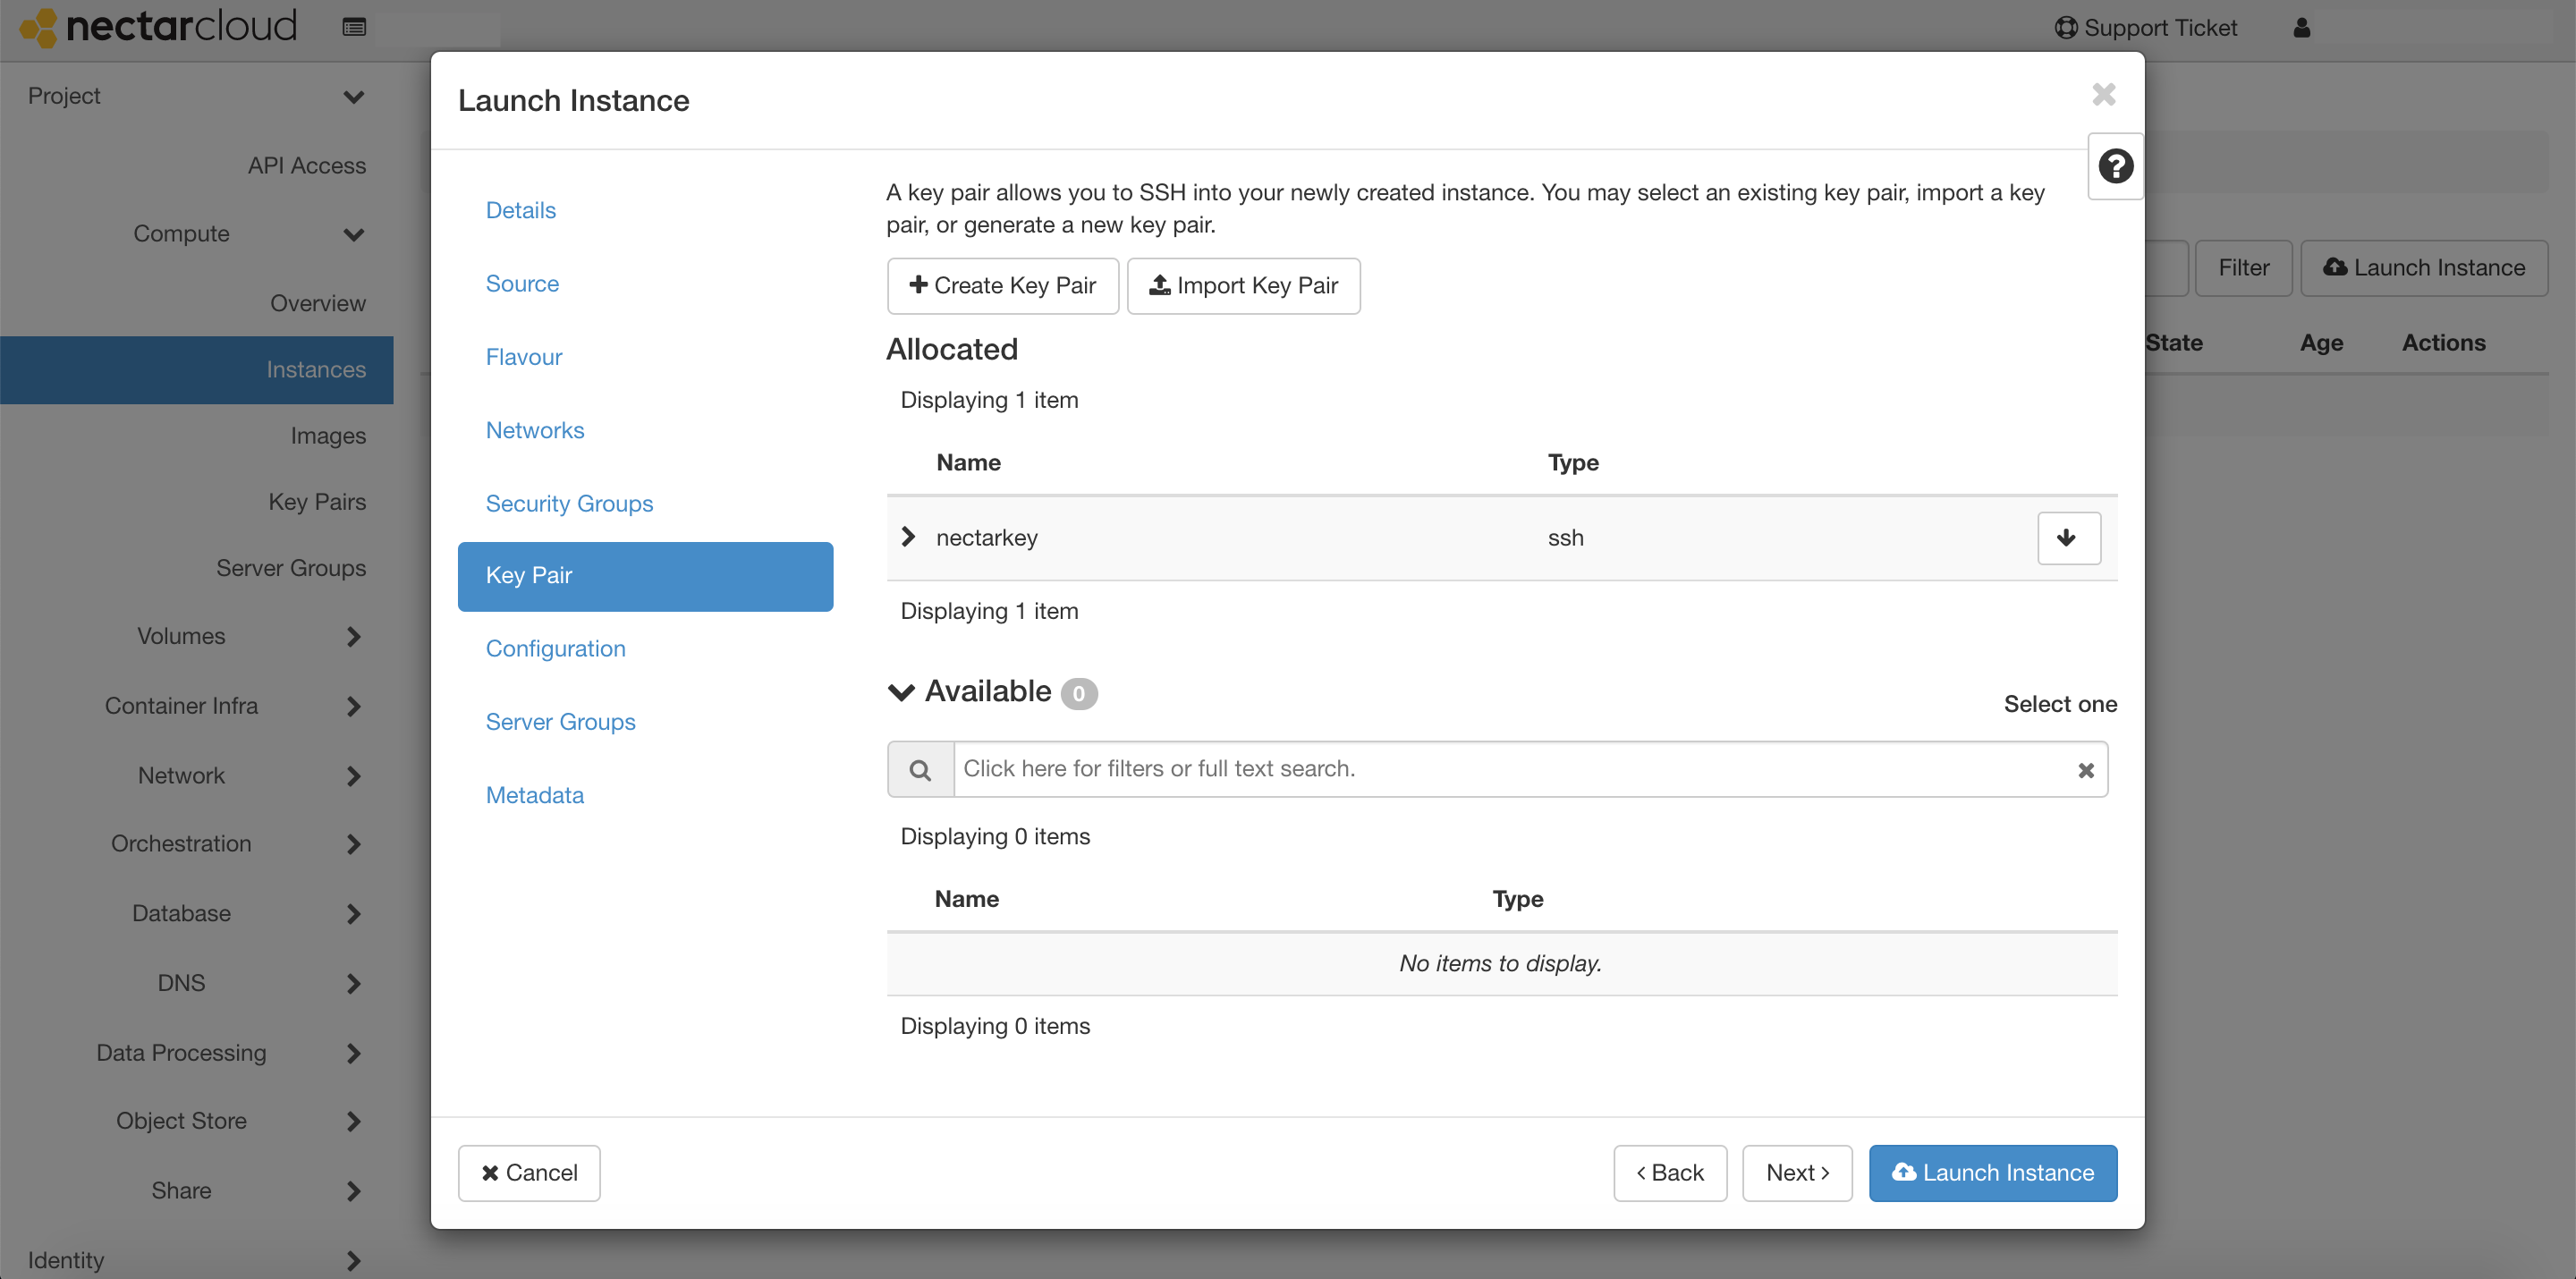
Key Pair
Finally, let's add the SSH Key to our virtual machine.
Attention
Make sure you do this step, otherwise you won't be able to access your virtual machine! You cannot add a key to your instance once it has been launched.
Press Key Pair from the panel on the left, and make sure that the key you made earlier is in the 'allocated' list. If it's not then select it from the 'available' list.
Launch
Now press Launch Instance and wait for your Virtual Machine to spin up!
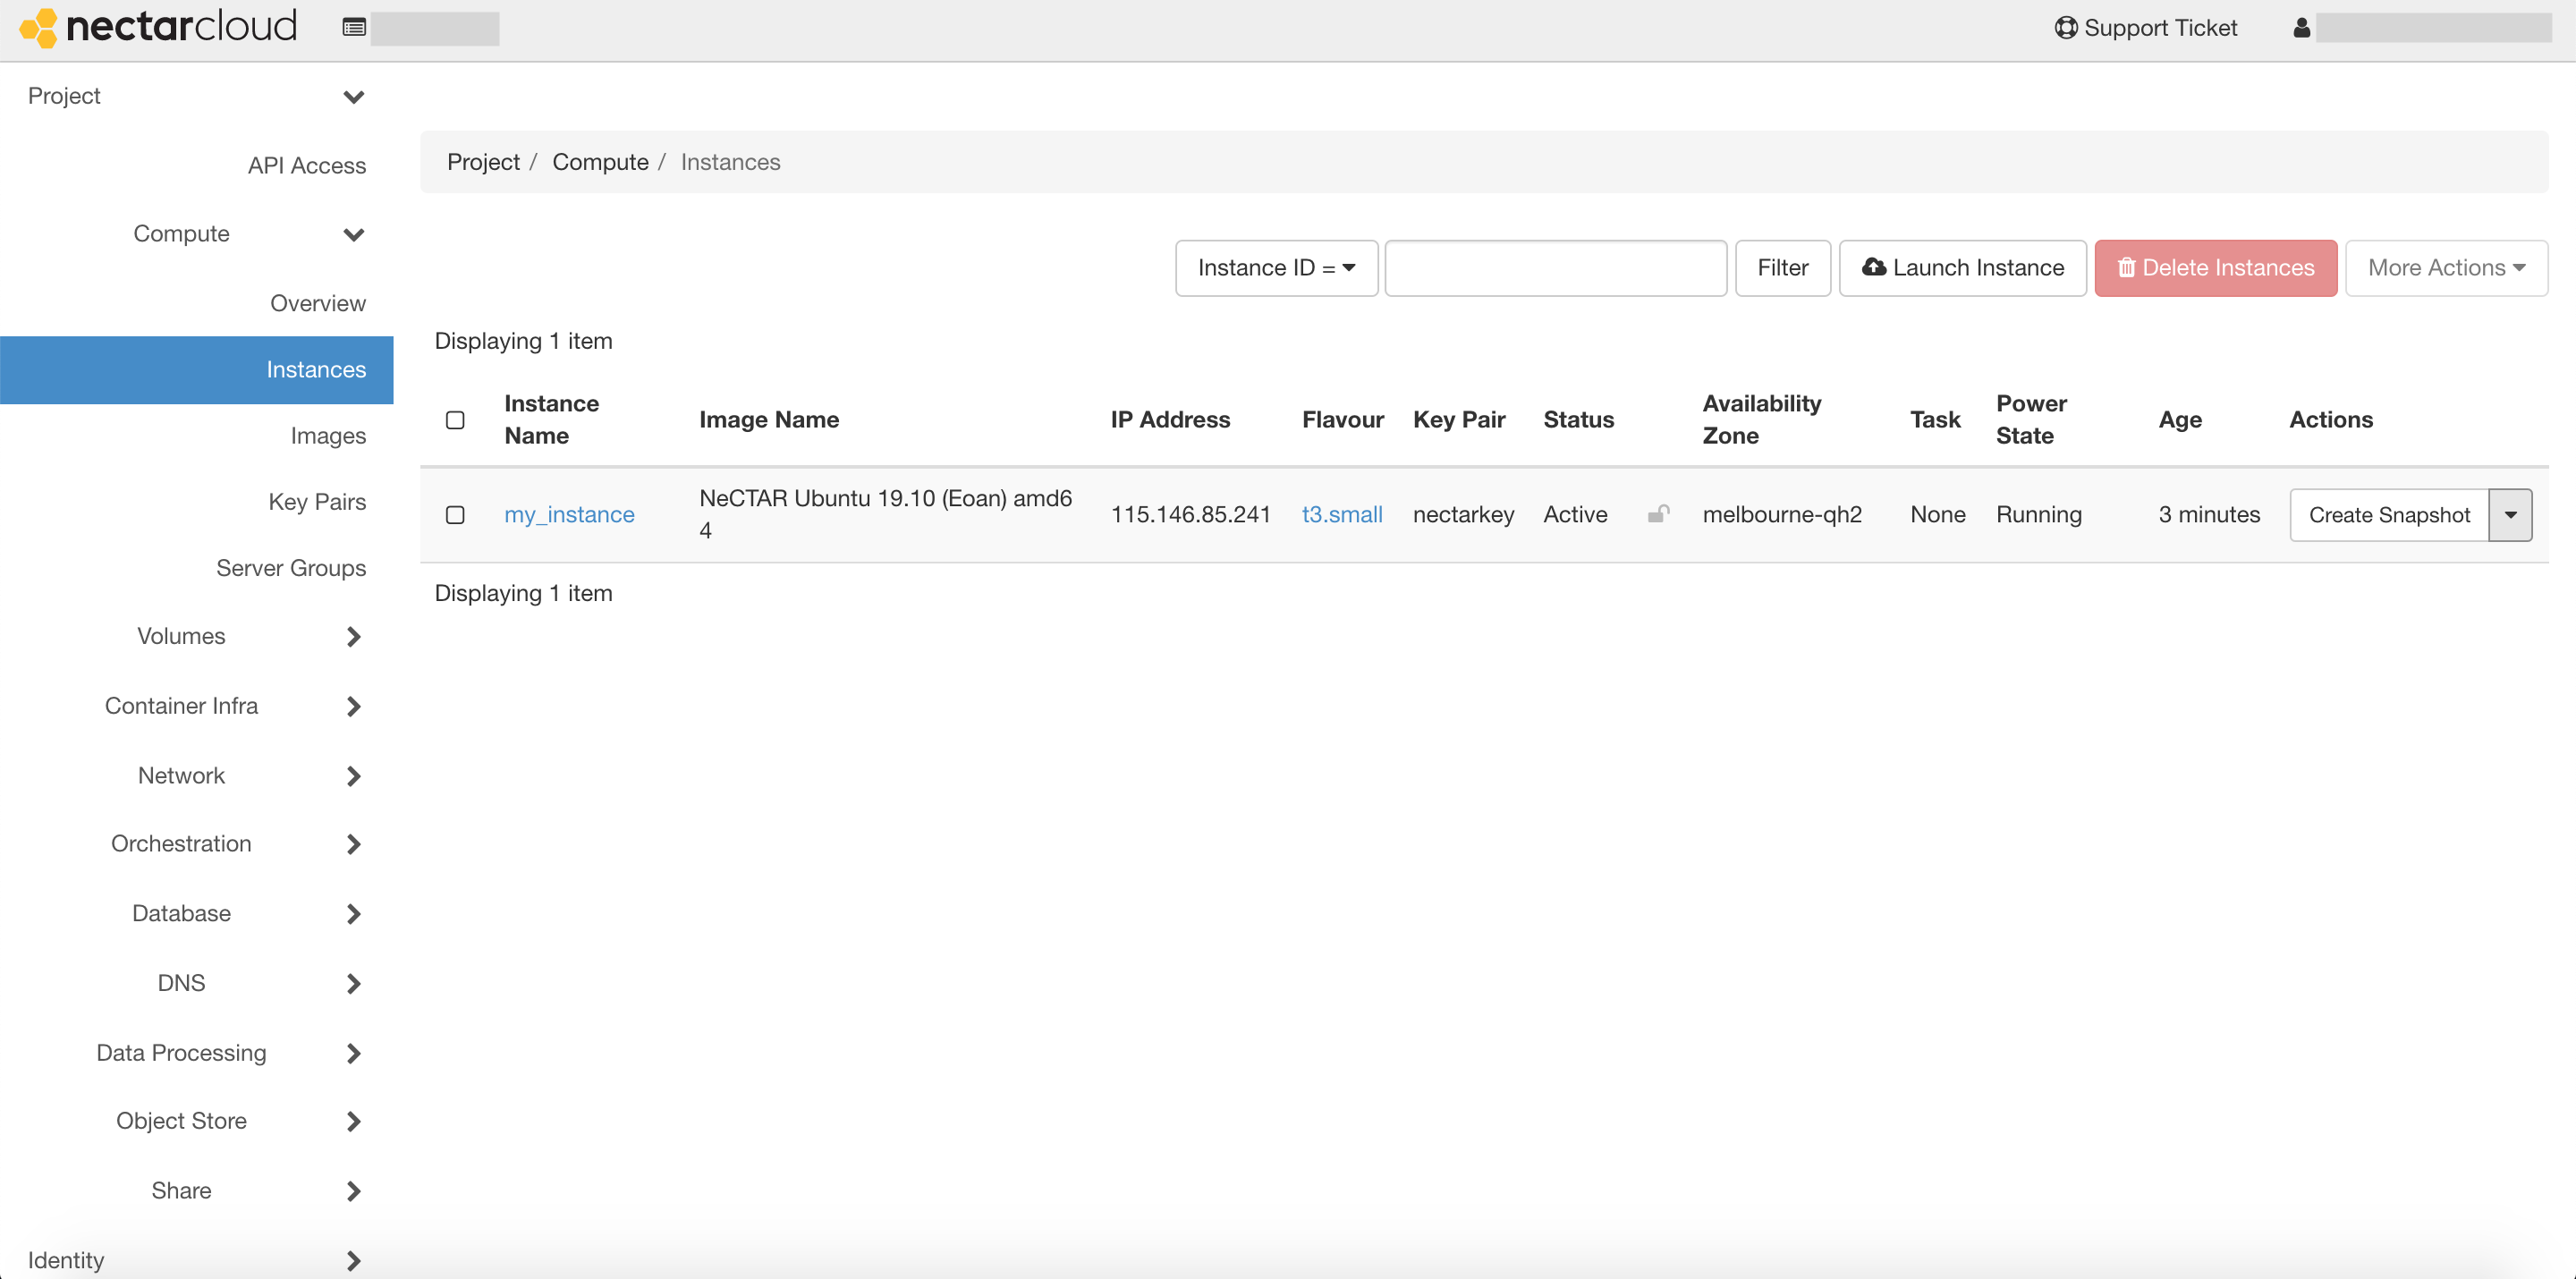
In the dashboard, in the Project > Compute > Instances pane, you should see your VM, and its status/state. You might have to wait a few minutes for it to build/spawn. You will know when it's done once it says Active in the status column.
Error
If there is an error starting your VM, you may have to delete your broken instance and launch a new one.
Note
Even when an instance is shutoff, resources are still held for it, and resource time is still counted towards your allocation.