Volume Storage
Depening on your computing and data storage needs, the disk space that is included in your instance may not be enough (30GB for most flavours). Furthermore, the root disk on images is NOT persistent, meaning that it is destroyed when you delete your VM.
A volume is additional storage that you can add to your instance, which IS persistent. In other words, data saved to the volume is not destroyed when you delete the instance it was attached to. It is also flexible in that it can be attached to your virtual machine at any point, or to any other VM. Think of it as a virtual external hard drive.
Creating a volume
Note
Trial projects do not allow for any volumes by default. You must request to increase your quota, or join a project that has a non-zero quota for volumes before you can continue.
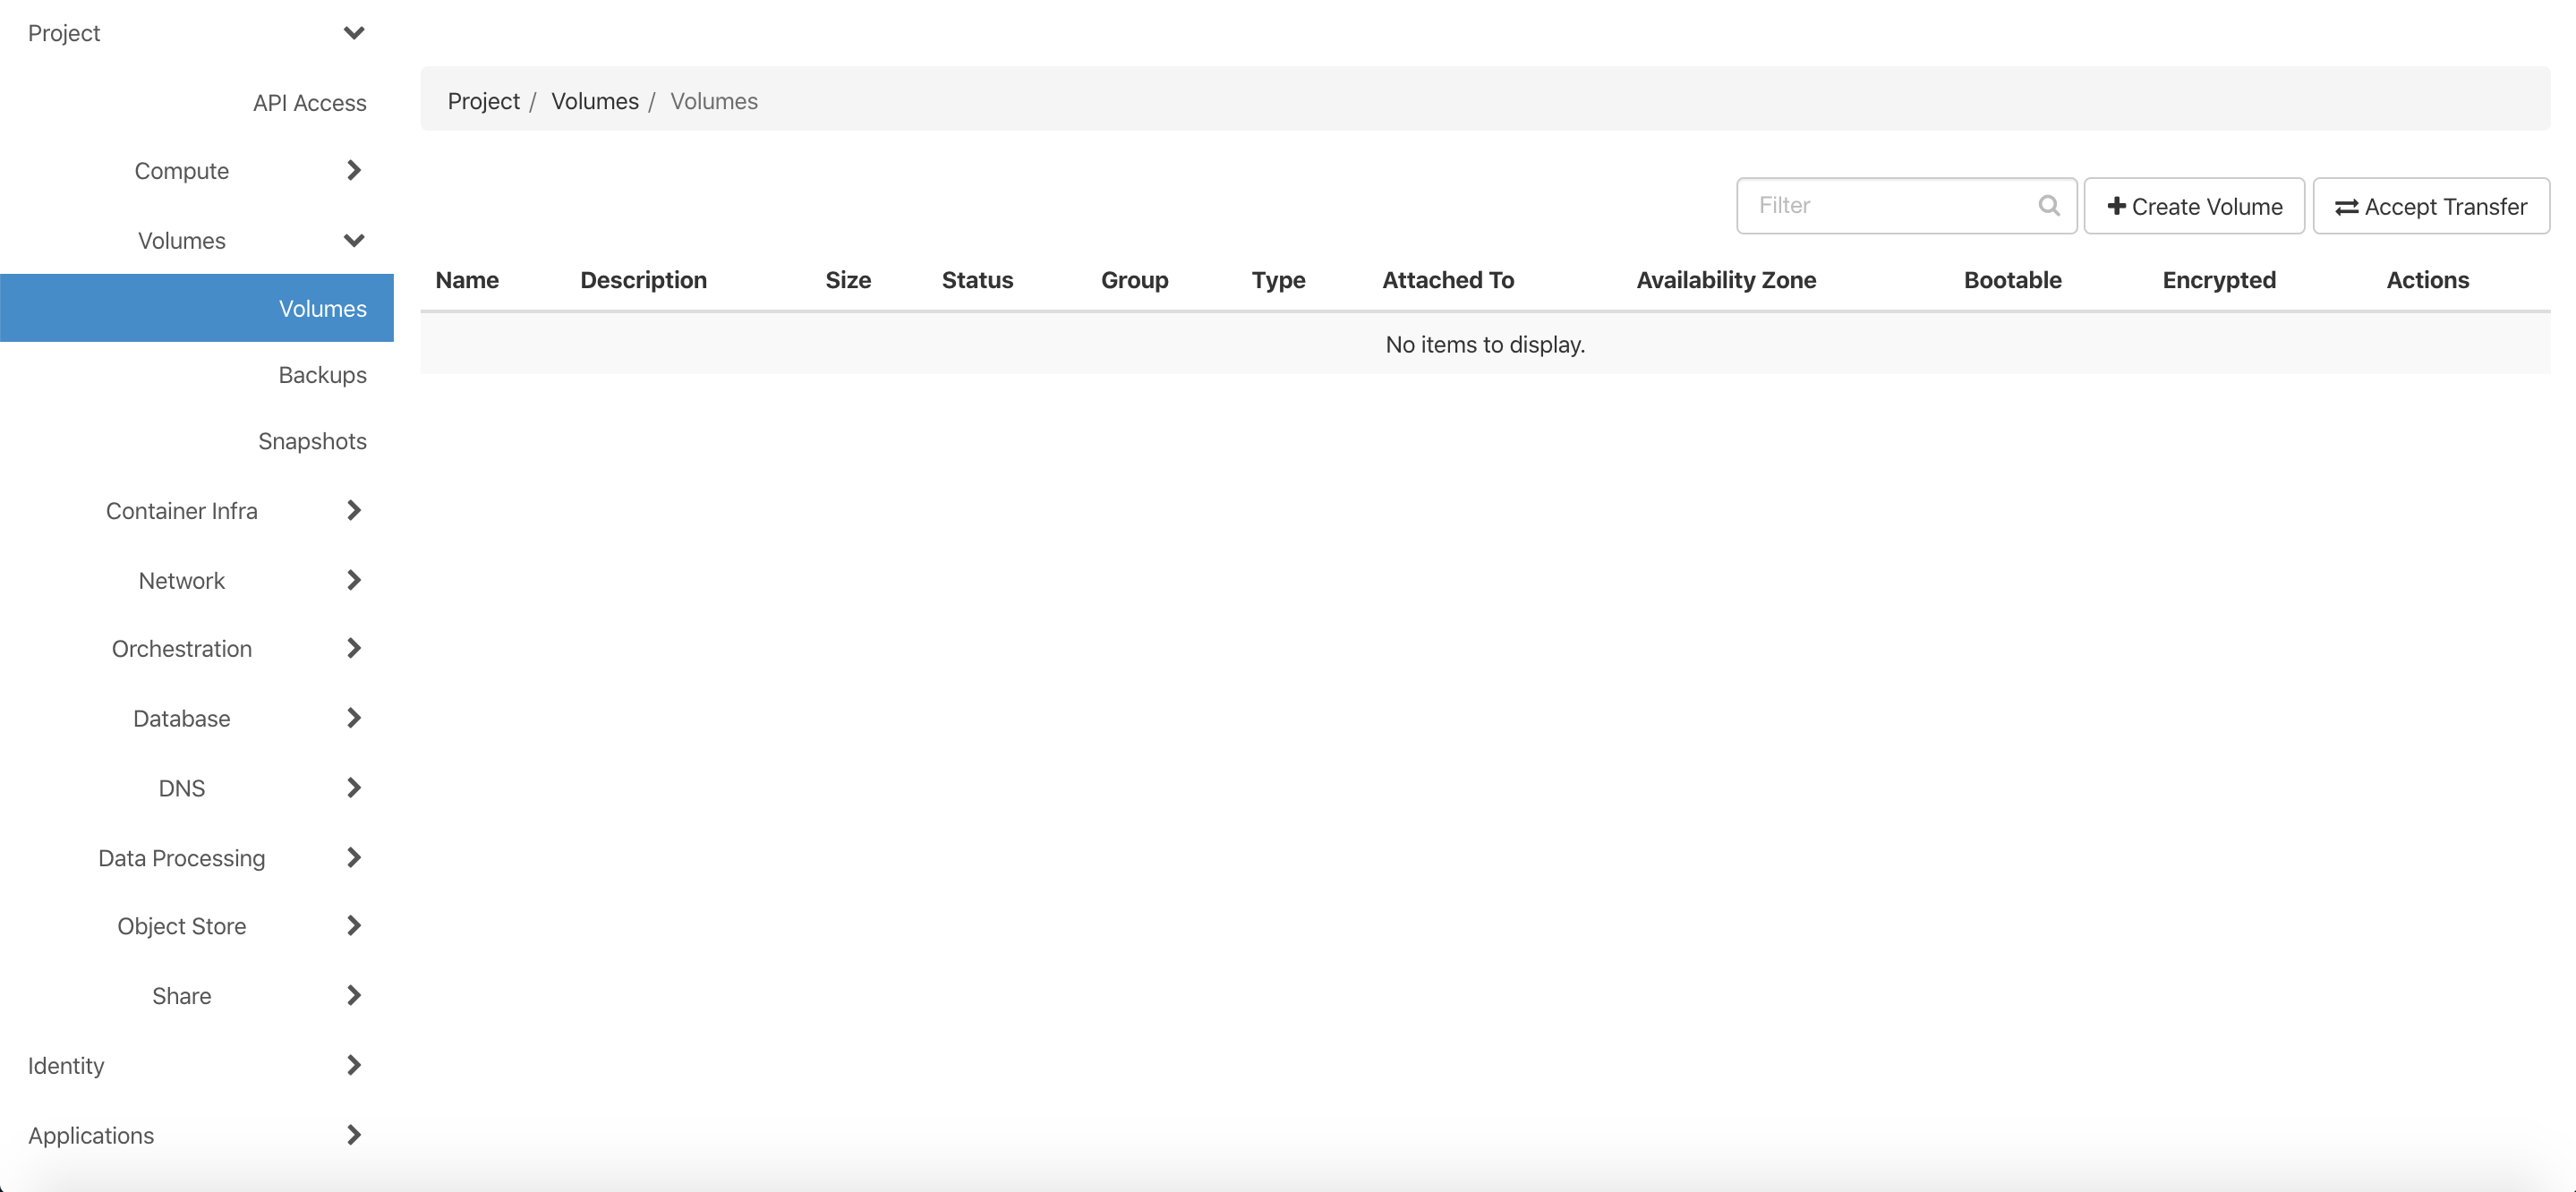
To create a new volume, select Project > Volumes > Volumes from the left panel on your dashboard, then press the + Create Volume button.
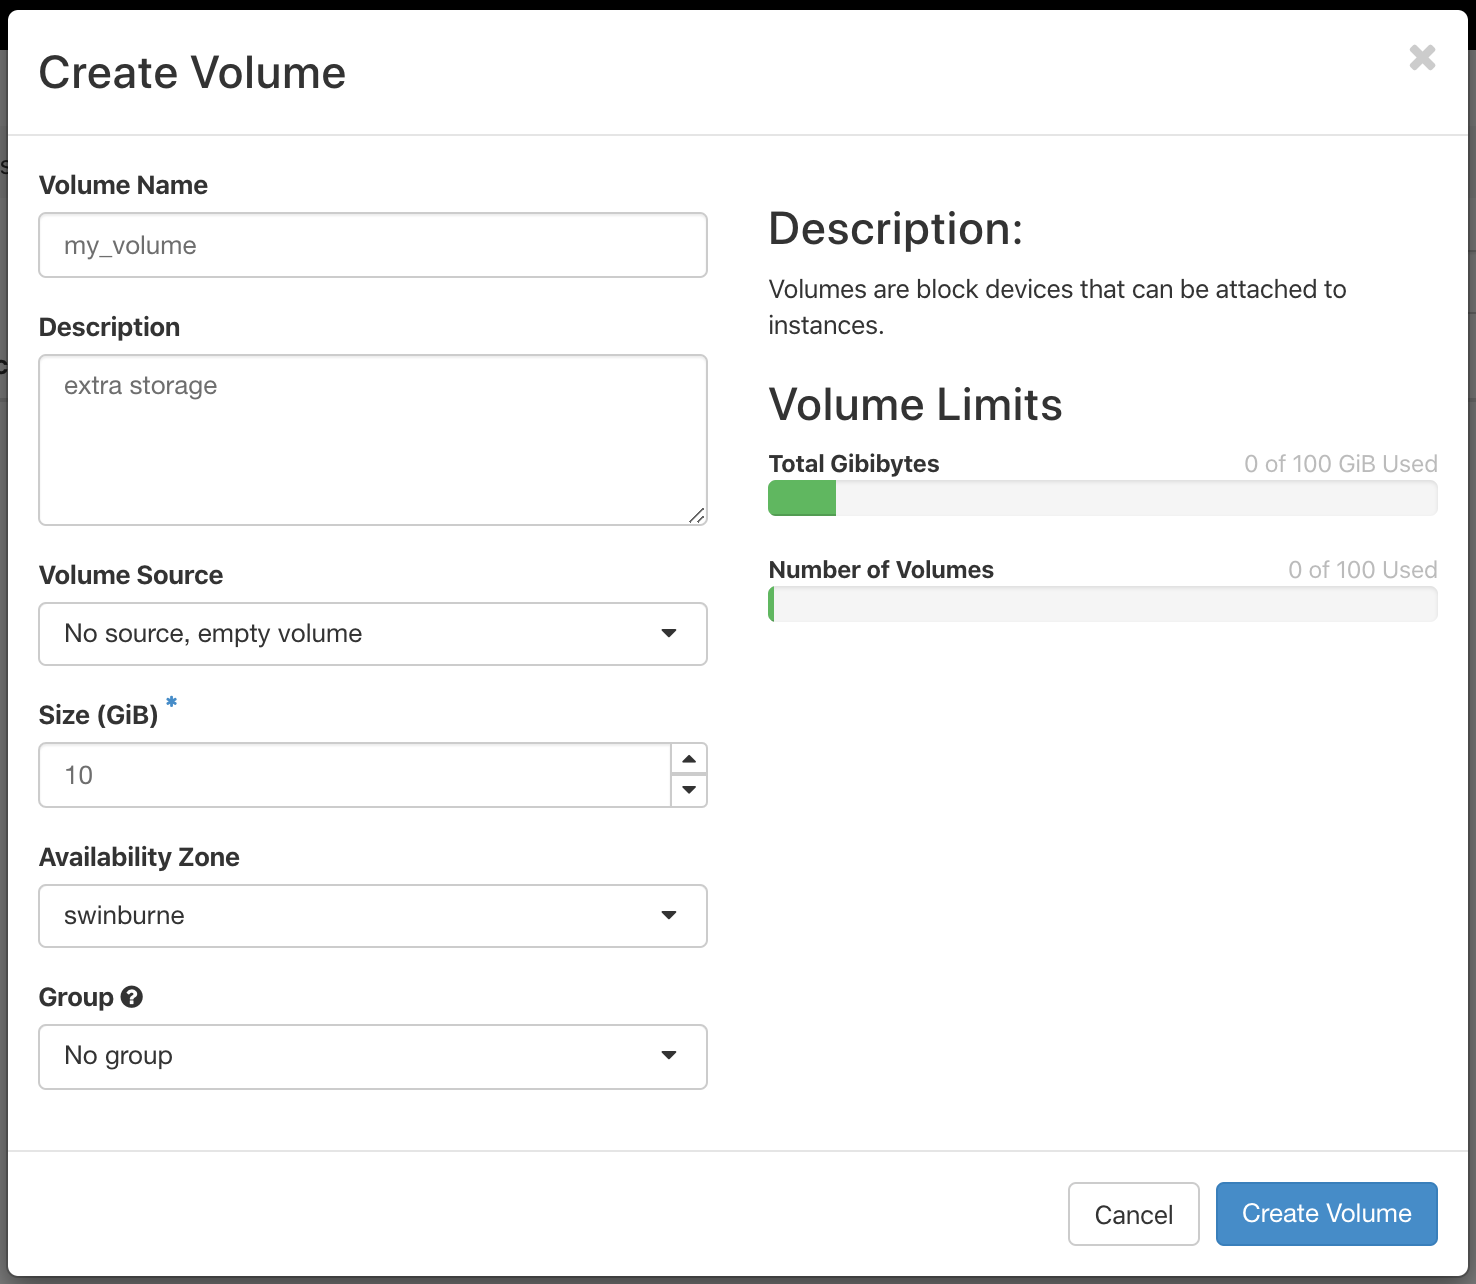
Specify a name and size for your volume, and make sure you pick the same availability zone that you instance is on.
Important
You cannot attach a volume to an instance if their availability zones do not match.
Attaching a volume
Now that you've created a volume, you need to attach it to your instance.
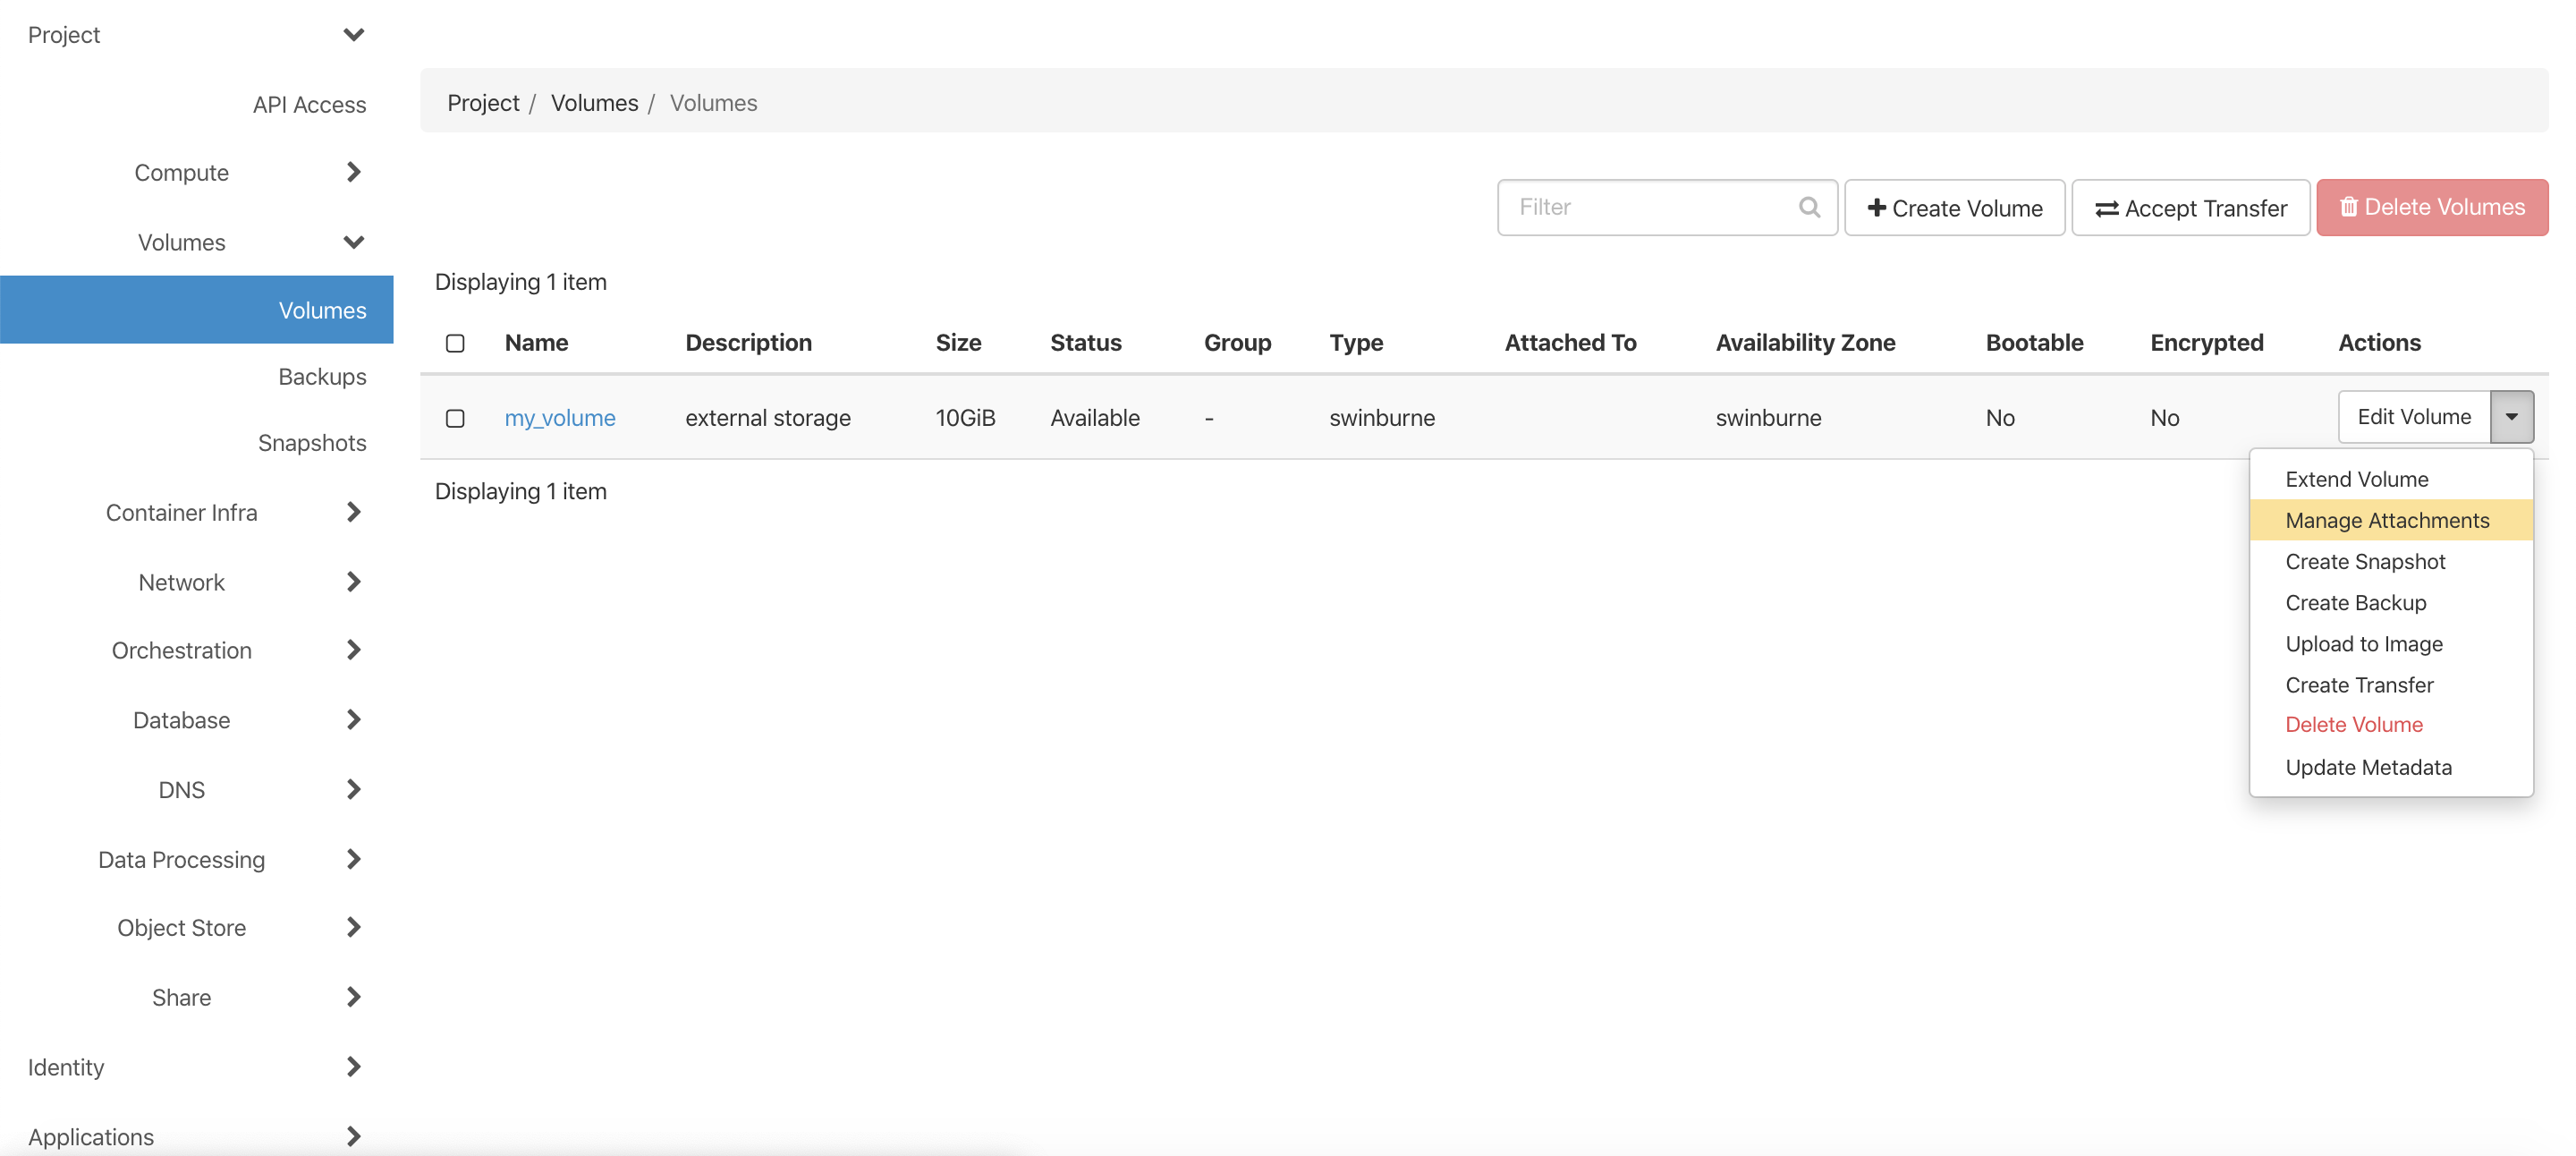
On the Project > Volumes > Volumes page, click the drop-down arrow next to your volume and select Manage Attachments.
Then select the instance you would like to attach the volume to, and click the Attach Volume button.
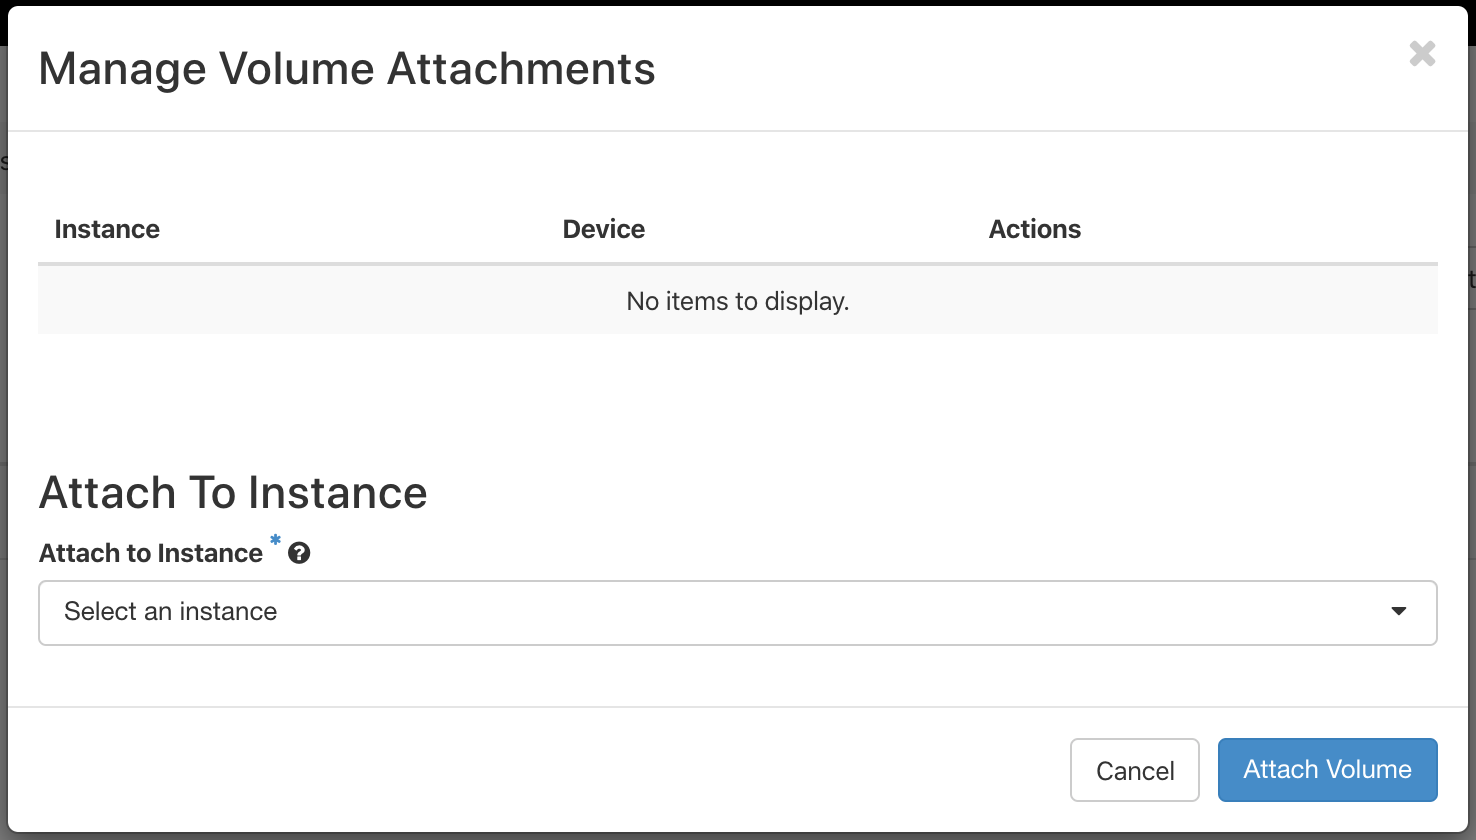
The volume should now be visible on your instance.
Creating a filesystem
Since we created an empty volume, we cannot write anything to it just yet because it doesn't have a filesystem.
To create a filesystem on your volume, log into your virtual machine and type
$ lsblk
This lists all the block devices on your machine
NAME   MAJ:MIN RM SIZE RO TYPE MOUNTPOINT
vda    252:0    0  30G  0 disk
└─vda1 252:1    0  30G  0 part /
vdb    252:16   0  10G  0 disk
The first one, vda, is the root disk that is provided by the instance flavour. It has one partition, called vda1, which is mounted at / i.e. the root of the filesystem.
The other disk, vdb, is the new volume that we just attached, and has no partitions mounted. We will make an ext4 type filesystem on the device with the mkfs command (short for make filesystem). This command typically requires superuser privileges (sudo), so type
$ sudo mkfs -t ext4 /dev/vdb
which should produce the output
mke2fs 1.44.1 (24-Mar-2018)
Creating filesystem with 2621440 4k blocks and 655360 inodes
Filesystem UUID: 002b0e9f-77d7-44ec-aca0-a0c86e364bcc
Superblock backups stored on blocks:
    32768, 98304, 163840, 229376, 294912, 819200, 884736, 1605632

Allocating group tables: done
Writing inode tables: done
Creating journal (16384 blocks): done
Writing superblocks and filesystem accounting information: done
Note
We have not created the filesystem on a partition on the disk. This is partly because we intend to utilise the disk as a whole, and partly to keep this guide as simple as possible by avoiding going through the process of creating a partition. However, it is generally recommended to create a partition even if you are using the disk as a whole.
Mounting
Next, we need to mount the disk to a directory so that we can read/write to it.
You can choose to mount it wherever you like, but it's good practice to mount it in /mnt, ideally in a new subdirectory, in case you want to mount multiple devices.
Let's create a new subdirectory within /mnt called my_volume
$ sudo mkdir /mnt/my_volume
Now we can mount the device /dev/vdb at the mount point /mnt/my_volume with the command
$ sudo mount /dev/vdb /mnt/data
If you list the devices again with lsblk, you will see that it is mounted.
You can also see more information about your device with the df tool. Type the command
$ df -h /mnt/my_volume
and you should see something like
Filesystem      Size  Used Avail Use% Mounted on
/dev/vdb        9.8G   37M  9.3G   1% /mnt/my_volume
Finally, you can change the ownership of the mount point to be the current $USER
$ sudo chown $USER /mnt/my_volume
If you don't do this, then it is owned by root, and you will need to prefix sudo to every command that will write to the filesystem.
Unmounting
To disconnect your volume from the VM, it is recommended you unmount it first before detaching. You can unmount the mount point
$ sudo umount /mnt/my_volume
or, to the same effect, you can unmount the device
$ sudo umount /dev/vdb
Then detach the volume via the dashboard on the Project > Volumes > Volumes page.
Note
The command is umount not unmount.
Labels
To give your volume a name that is consistent regardless of where it is attached, and regardless of what else is connected, you can give it a label with the e2label command. For example, to give the volume currently attached to /dev/vdb the label storage, type
$ sudo e2label /dev/vdb storage
To confirm it worked, you can use lsblk --fs, which displays the labels of all devices on your machine (typically blank by default).
You can now refer to this volume by its label storage when mounting
$ sudo mount -L storage /mnt/my_volume
This is useful when connecting your volume to another machine where the attach point might be different (e.g. /dev/vdc, because a different volume is already attached to /dev/vdb). It's also useful to help distinguish volumes, particularly when they're the same size.
Auto mounting
Whenever your machine is rebooted you will have to manually remount your volume, unless you set up auto mounting by making an entry in /etc/fstab.
For this you'll need either the label or the UUID of your volume. You can check what they are with lsblk --fs.
You'll also need to edit the fstab file in sudo mode, e.g.
$ sudo nano /etc/fstab
The entry must be in the format
<file system> <mount point> <type> <options> <dump> <pass>
If you've labelled your volume, add this line to the bottom of the file
LABEL=storage /mnt/my_volume ext4 defaults,nofail 0 2
Alternatively, you can refer to the file system with UUID=.
To make sure the new entry is valid and to mount the device (if it hasn't been mounted already) type sudo mount -a. You shouldn't see any output if everything is in order.
See also
For more details, see the fstab manual page by typing man fstab.